How to Make an Apron From Blue Jeans
How to Turn Your Well-Worn Jeans Into a Stylish, Rugged Apron
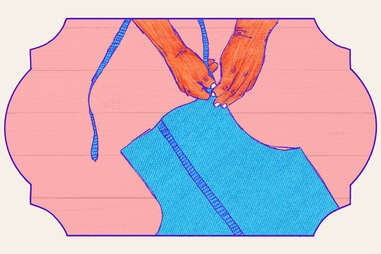
It's the perfect accessory for getting your hands dirty in the kitchen, shop, or studio.

Photo by Xin Shen / EyeEm | Graphic design by Maitane Romagosa for Thrillist
Durable, classic, and quintessentially American, blue jeans are an essential item you'll find in most wardrobes. While the silhouettes have changed over time (think bell-bottoms, skinnies, and high-waisted, just to name a few) and the colors du jour have certainly varied (dark rinse, stonewashed, and perfectly faded have all had their heyday), one thing has remained relatively constant since the late 1800s in America: Jeans were usually made from denim. A rugged fabric only made stronger with hardware like rivets, a well-constructed pair of jeans can last decades—a true marriage of fashion and function.
While a classic pair of jeans rarely goes out of style, trendier cuts might have a more limited shelf life. Sure, you could always donate less flattering pieces to your favorite secondhand store, but consider keeping a few tired pairs on hand for your next DIY weekend project. In this case, a pair of well-loved jeans gets upgraded into a sturdy apron—perfect for getting your hands dirty in the kitchen, shop, or studio.
Materials:
– A pair of well-worn jeans (or newer, if you prefer)
– Scissors
– Tissue paper
– Chalk
– Sewing needle
– Thread
– Seam ripper
– Measuring tape or ruler
– Sewing machine (optional)
– Iron or steamer
– Apron (to create the pattern)
Steps:
1. Source your denim
Whether you raid your own closet or source jeans from a local thrift shop, pick a wash that looks pleasantly faded and a denim that's broken-in enough to be pliable. This project is especially great for jeans with a zipper beyond repair or for jeans that have worn completely through in some spots. Pay close attention to details like stitching, hemlines, and button closure, as these can all impact the final look of your DIY apron.
2. Prep the jeans
Wash the jeans according to the instructions on the tag, and lay flat to dry to avoid any shrinkage. Before disassembling the jeans, pass a hot iron or steamer over them—working with fresh-pressed fabric makes cutting, seam ripping, and stitching so much smoother.
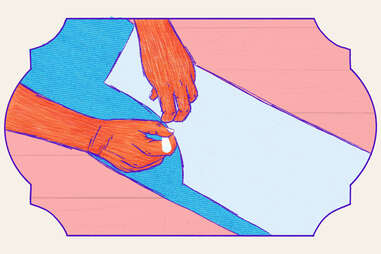
3. Design the apron pattern
To create a sewing pattern, grab an apron that fits you well and fold it in half lengthwise. Next, fold a piece of plain tissue paper in half. Ignoring the ties at the neck and waist, trace the apron onto the tissue paper, making sure to align the folded edges. Set the apron aside, then cut along your traced line carefully. Unfold the tissue paper to reveal your apron body's pattern.
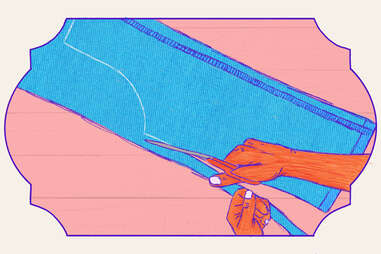
4. Cut the denim
Refold the tissue paper at its crease, and place it along the edge of one of the pant legs, again matching the folded edges. Move the bottom of the apron pattern to the hem of the pant leg (you'll use the jean leg opening as a finished edge for your apron, eliminating some of your future hem work). Using a piece of light-colored chalk, trace the pattern onto the denim lightly. Cut along your traced line, and unfold the denim to reveal the body of the apron.
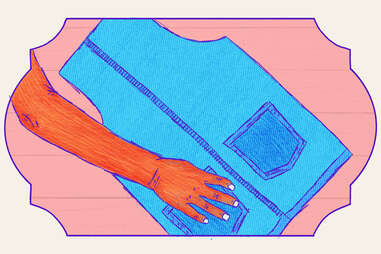
5. Repurpose the jean pockets
Taking care not to damage the fabric, use the seam ripper to remove the back patch pockets from the pants. Place the pockets on the front of the apron around where the hands would naturally fall, and pin to hold them in place. Make sure your pockets are centered with a ruler or measuring tape before sewing them on.
6. Attach the pockets
Thread a needle with a durable thread that matches the color of the stitching on the jeans, and attach the pockets to the apron with a simple backstitch or a more decorative whipstitch. Be sure to knot the thread at the interior of the apron to hide the finish.
7. Stitch the apron hem
To prevent the non-bottom edges of your apron from fraying, press or pin a double-fold hem into place. Stitch along the fold line, again using thread that matches the rest of the garment's stitching. While you could hand-stitch the hem, a sewing machine will make quick work of an otherwise tedious job.
Advertisement

Good styling can make all the difference in helping a space feel like your own—and the same goes for the car you drive. The first-ever Toyota Corolla Cross has standard LED headlights, plus available 18-inch alloy wheels, roof rails, and moonroof. It's style that's just right, wherever your weekend projects take you.
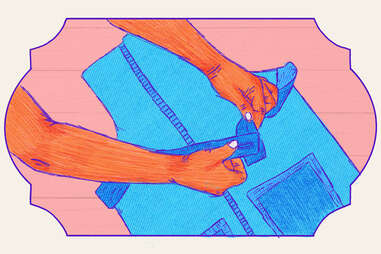
8. Measure the waist ties
Remove the waistband of the jeans with a sharp pair of scissors, cutting just below the second seam. Cut the waistband in half (directly opposite the button closure), then pin the raw edges to the body of the apron to create the waist tie. Try the apron on and button the waistband to ensure the fit is correct. To adjust the size of the waist tie, trim length from the raw edges, then repin to the apron.
9. Attach your waist ties
Either by hand-stitching or using your machine, attach the waist ties to the body of the apron. These seams will see the most strain, so go over your stitches two or three times to increase the apron's longevity.
10. Create the neck ties
Select another finished edge from the pair of jeans (an interior leg seam is usually a good option), and trim it cleanly from the rest of the jeans. Snip the length in half, then attach either end to the neck of your apron with a few stitches each. Because you'll tie this strand around the wearer's neck, it's best to leave plenty of extra length to allow room to maneuver the ties.
Want more Thrillist? Follow us on Instagram , Twitter , Pinterest , YouTube , TikTok , and Snapchat .
Source: https://www.thrillist.com/shopping/nation/diy-denim-jeans-apron
0 Response to "How to Make an Apron From Blue Jeans"
Post a Comment